How to use the Arc Teleport in Vizard
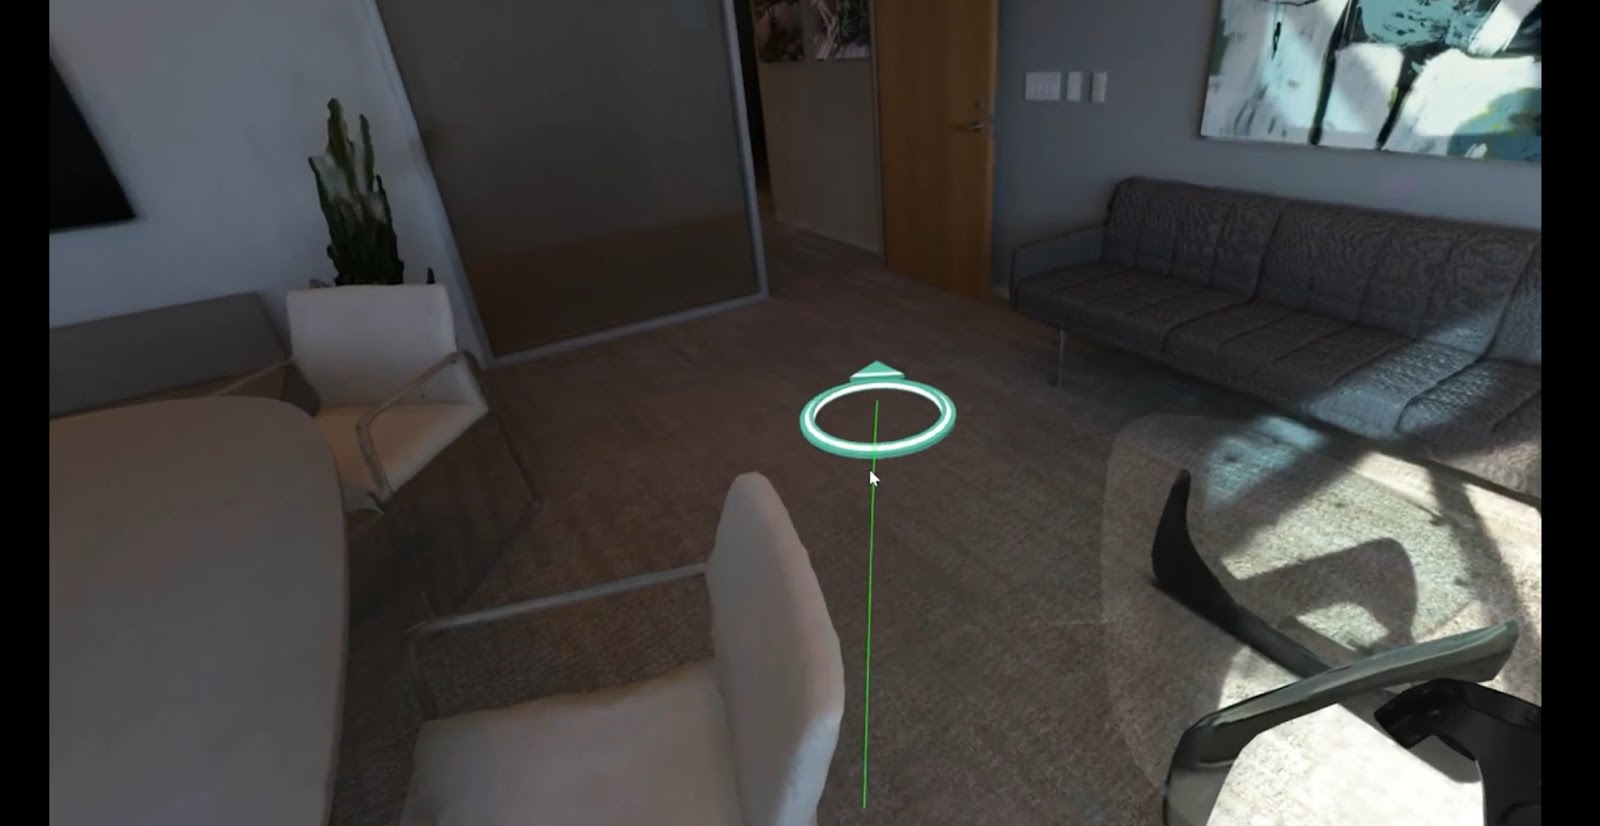
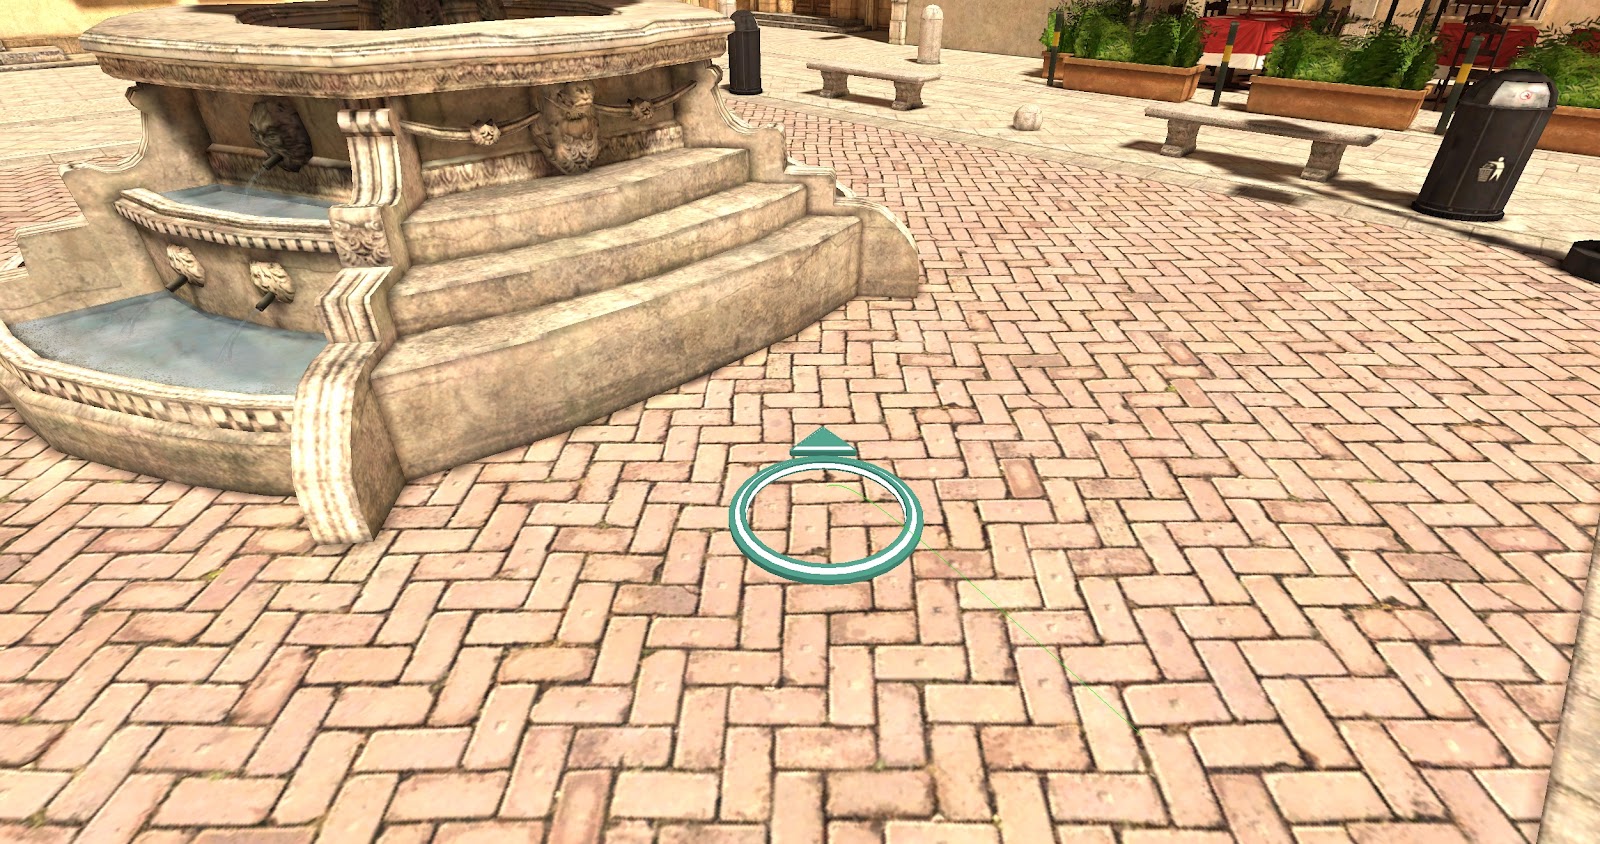
Vizard 7 now includes the ability to move through VR using the “arc teleport” method, as well as “snap rotation” for rotating. This is an effective way to navigate large spaces while eliminating any motion sickness associated with smooth movement using a controller. If a target is valid, you will see a green “arc” project out with a platform showing where you will teleport to. If a target is not valid (such as the side of a wall), the arc will be red and no platform will be shown.
Presets
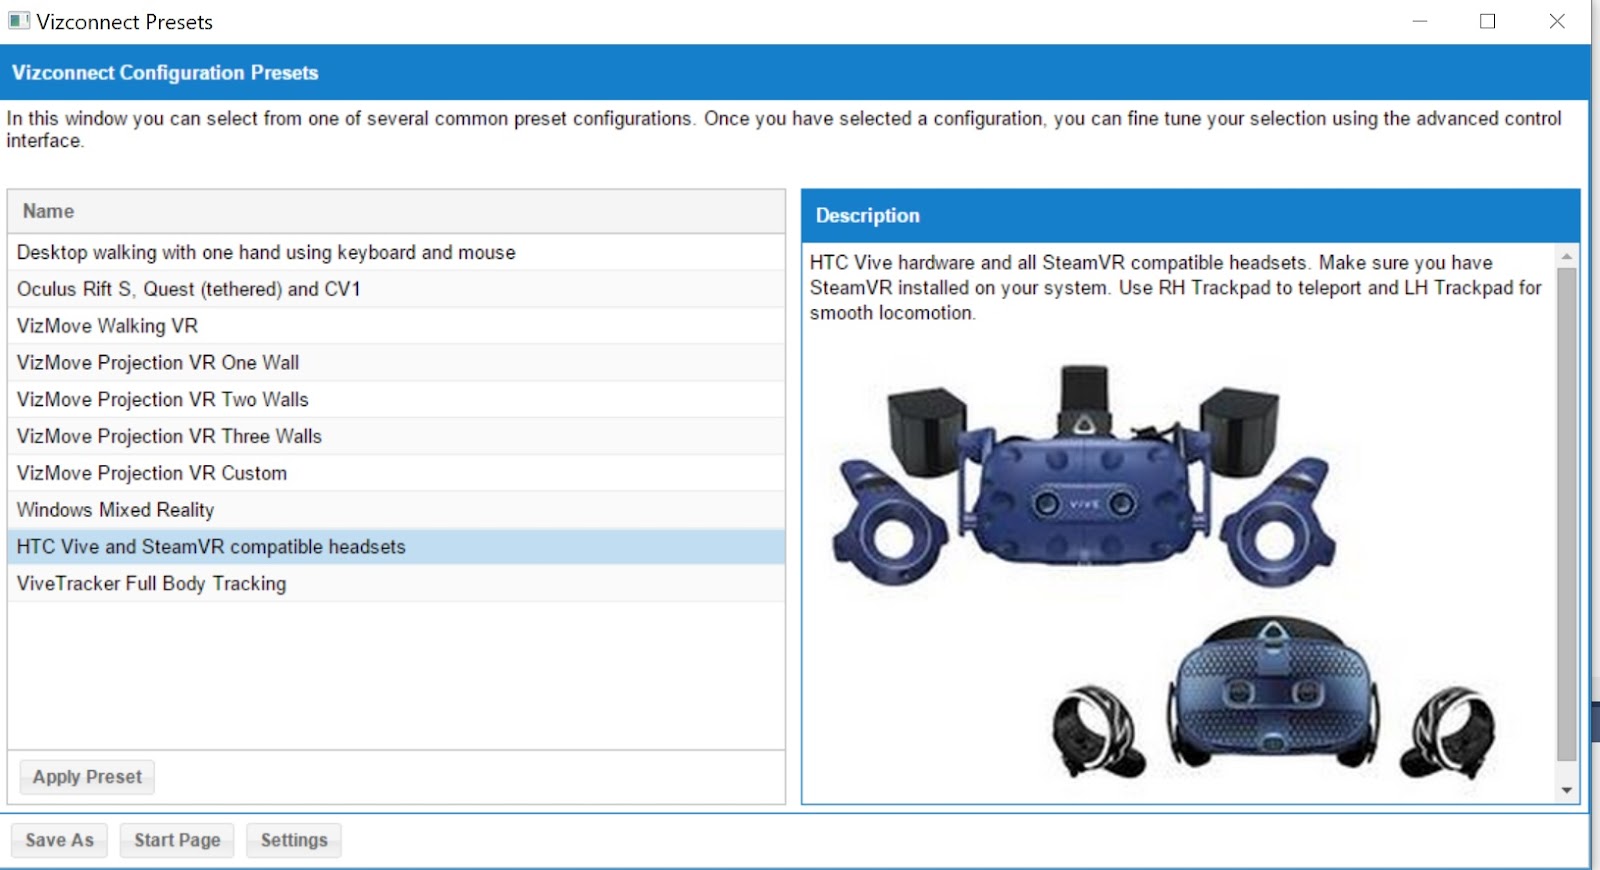
There are presets that you can quickly choose from to allow this to be used with either the Oculus line of headsets, Vive/Steam VR line (which includes the Vive Pro, Vive Cosmos and more), as well as the WinMR line of headsets.
For Vive and SteamVR headsets, Use RH Trackpad to teleport (click once to place, and release to teleport) and LH Trackpad for smooth locomotion. For Oculus headsets, use RH 'B' button to teleport and LH Stick for smooth locomotion.
Setting Up Manually
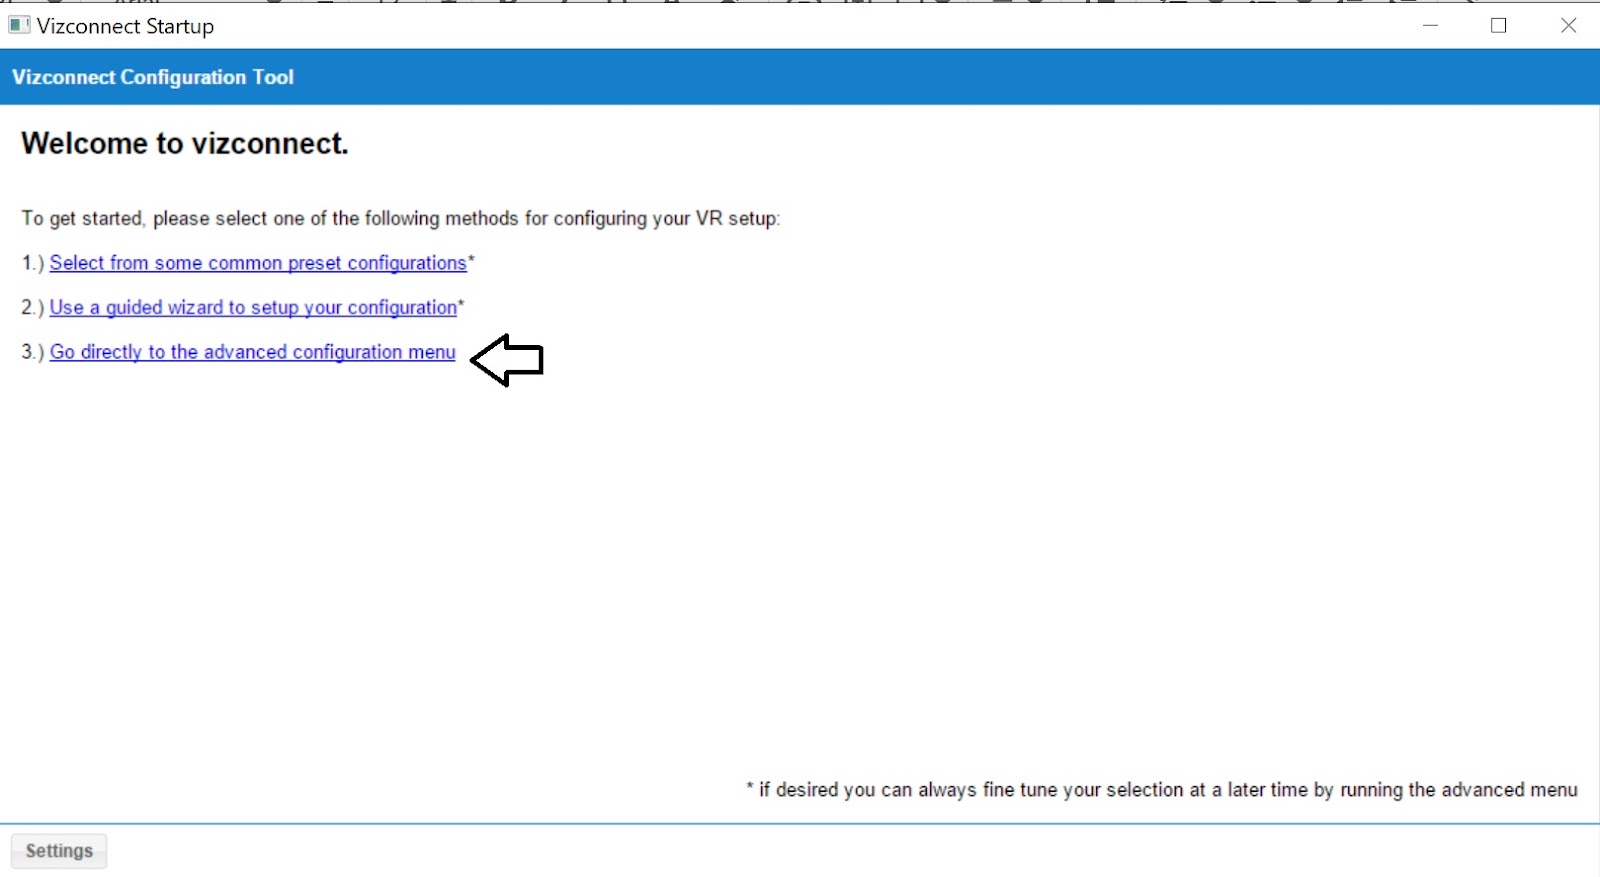
To add an arc teleport manually, follow these steps:
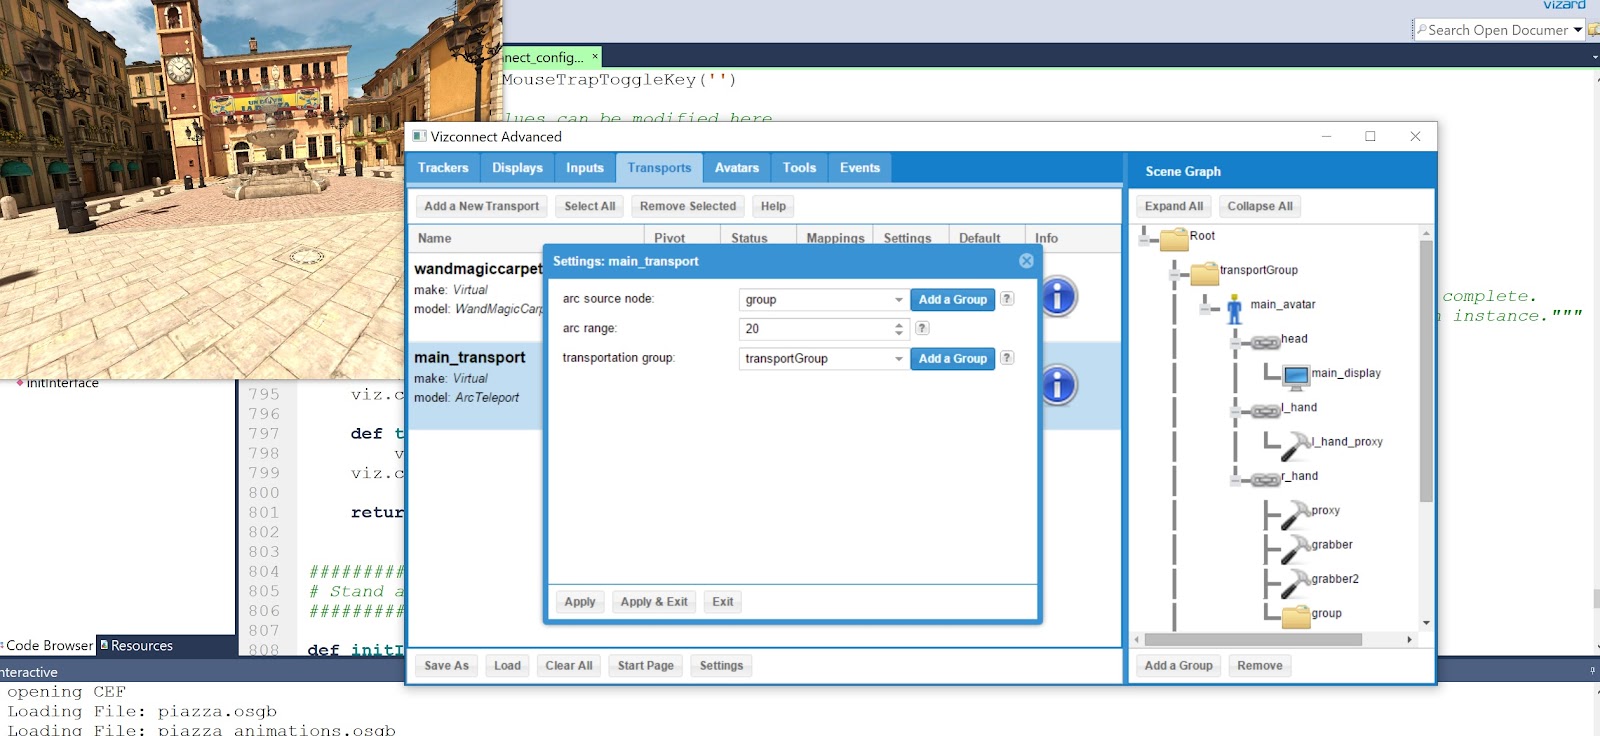
Choose the “Advanced Configuration” menu
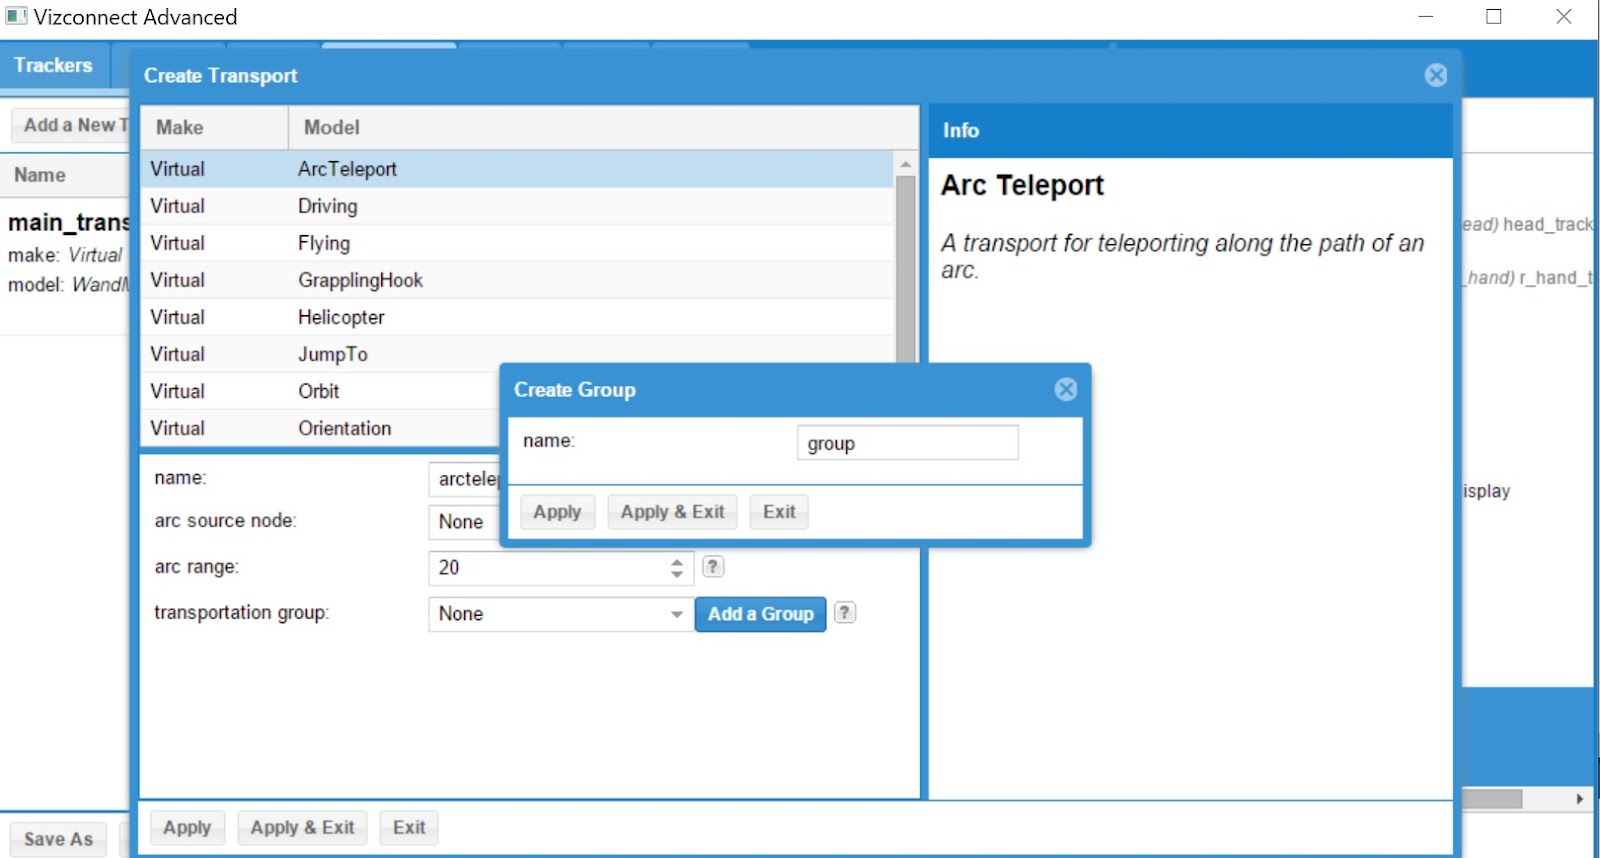
From the “Transports” tab, choose “Virtual- Arc Teleport”
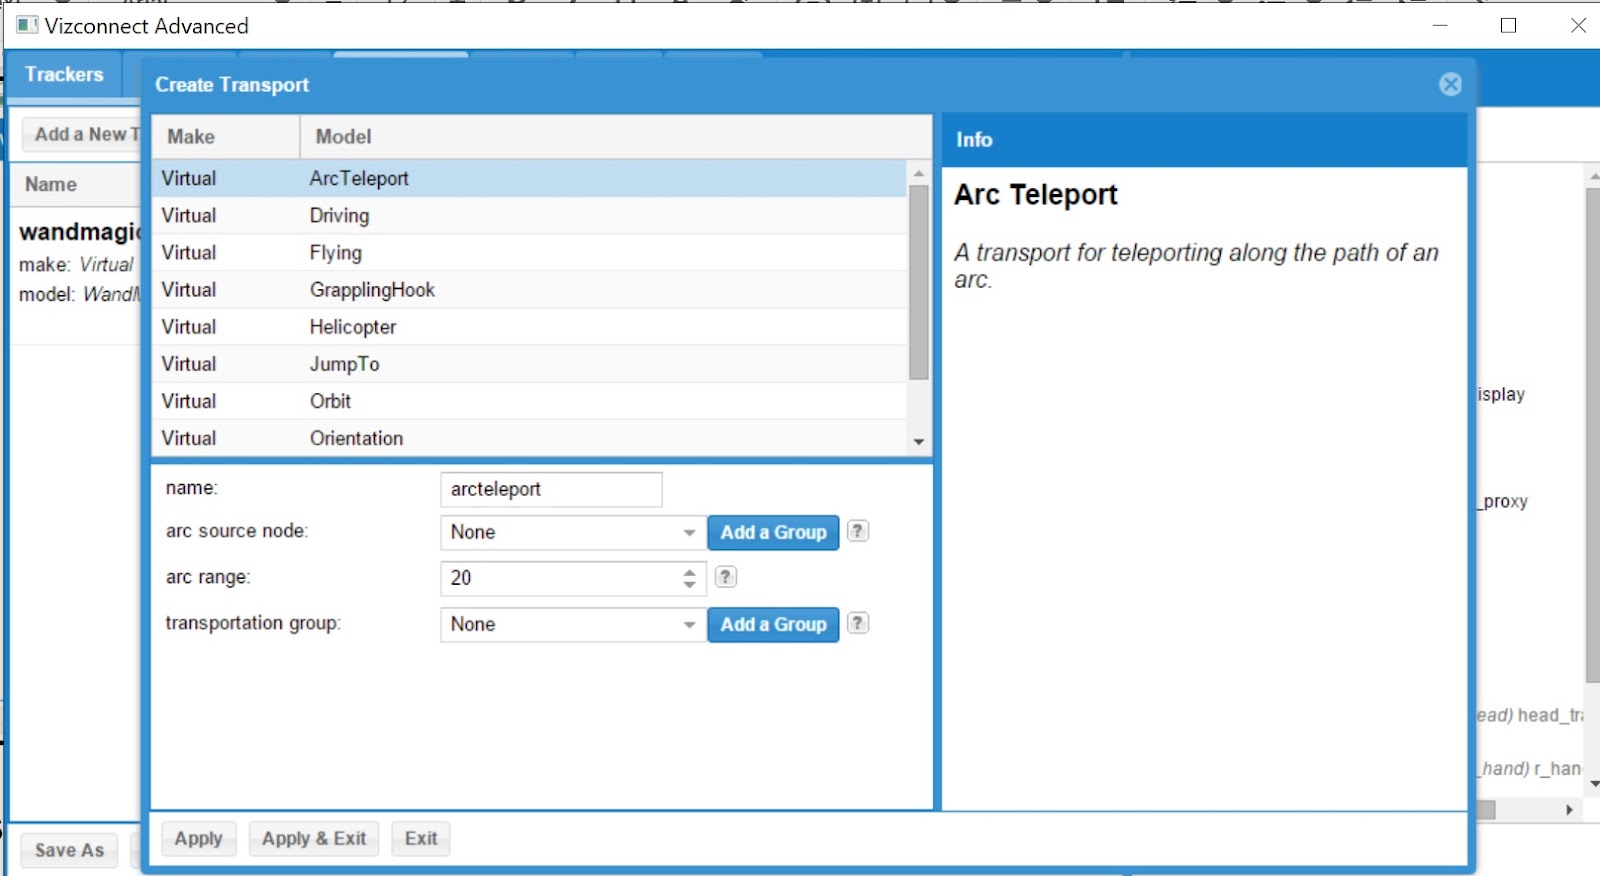
Click “Add a group” under “arc source node”, give it a name if you like and then select that group to be the arc source node. Can also adjust the range of the arc and, if you’re using multiple transports, choose a transportation group.
In the vizconnect “Scene Graph” drag the group to be under the hand or object you want the arc to project from. In this case, we’re using the right hand.
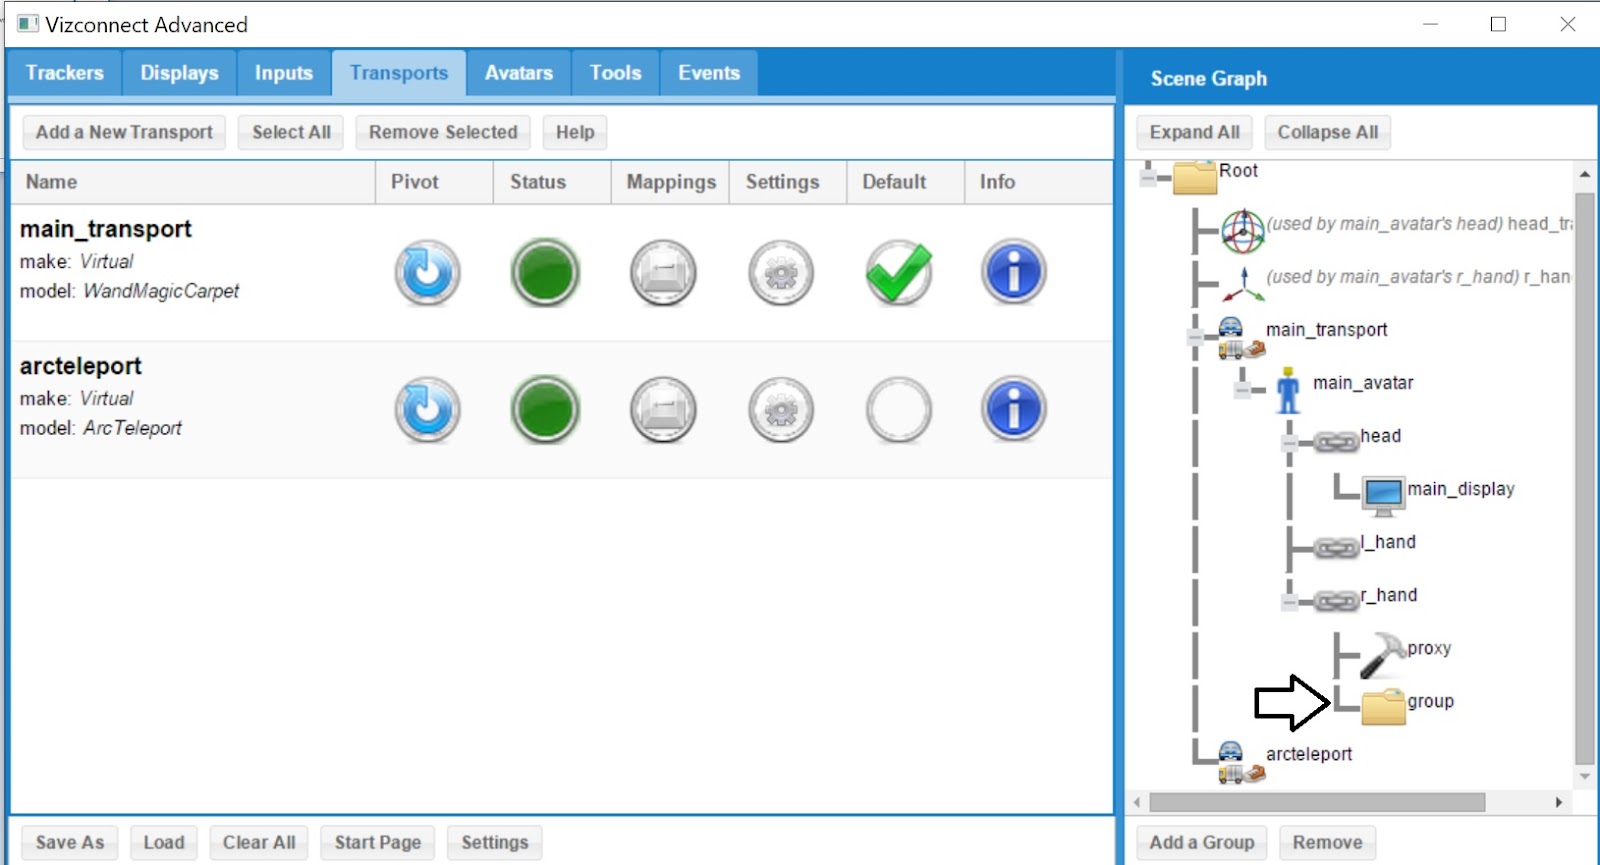
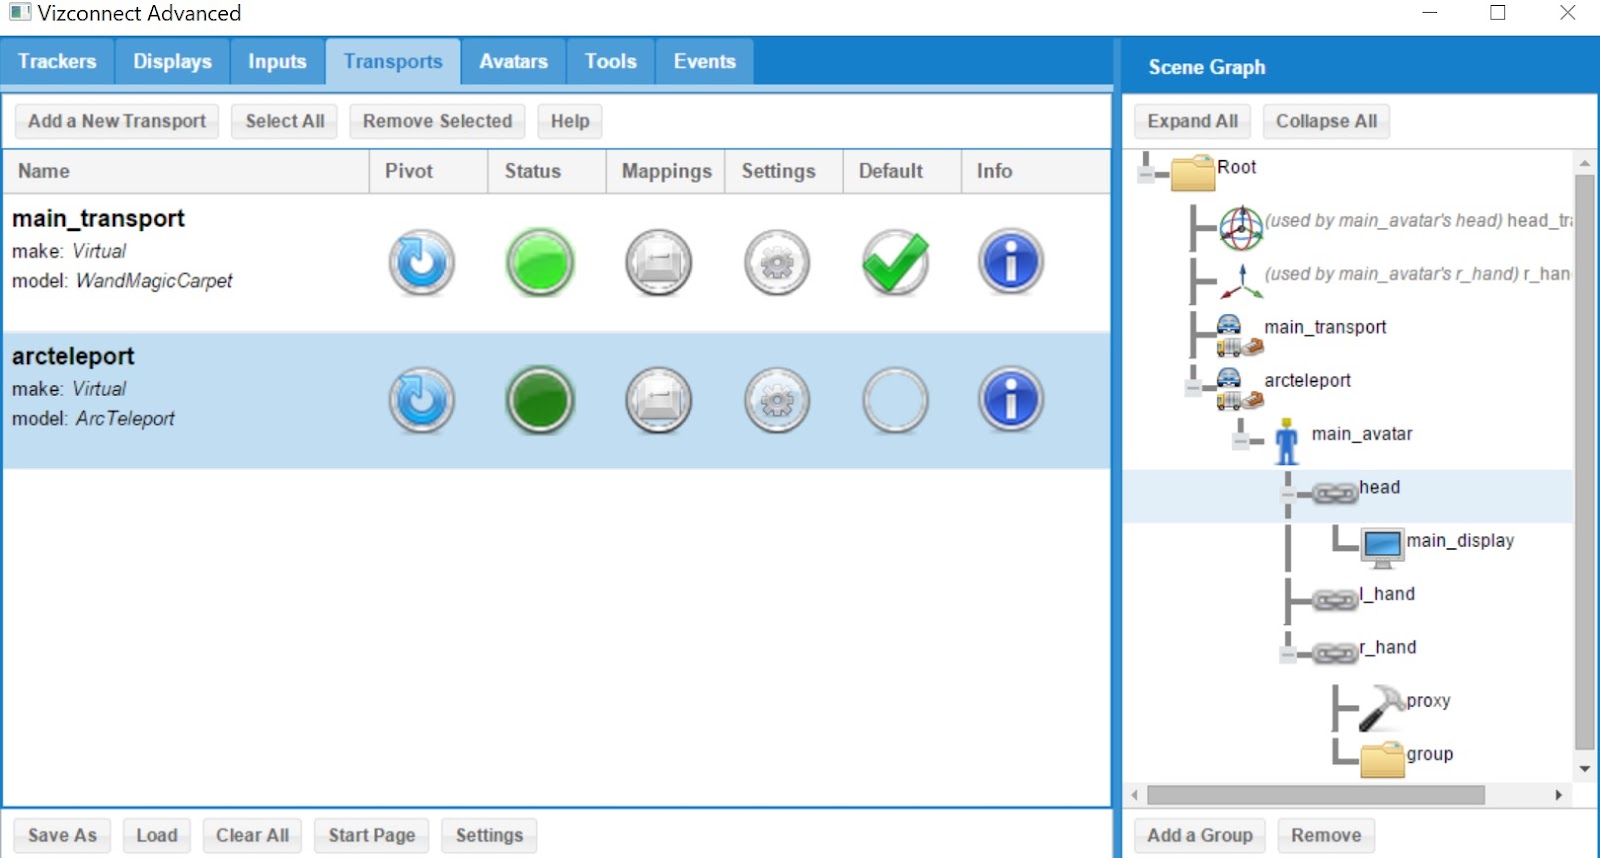
Then, drag the avatar to be under the arc teleport transport you added
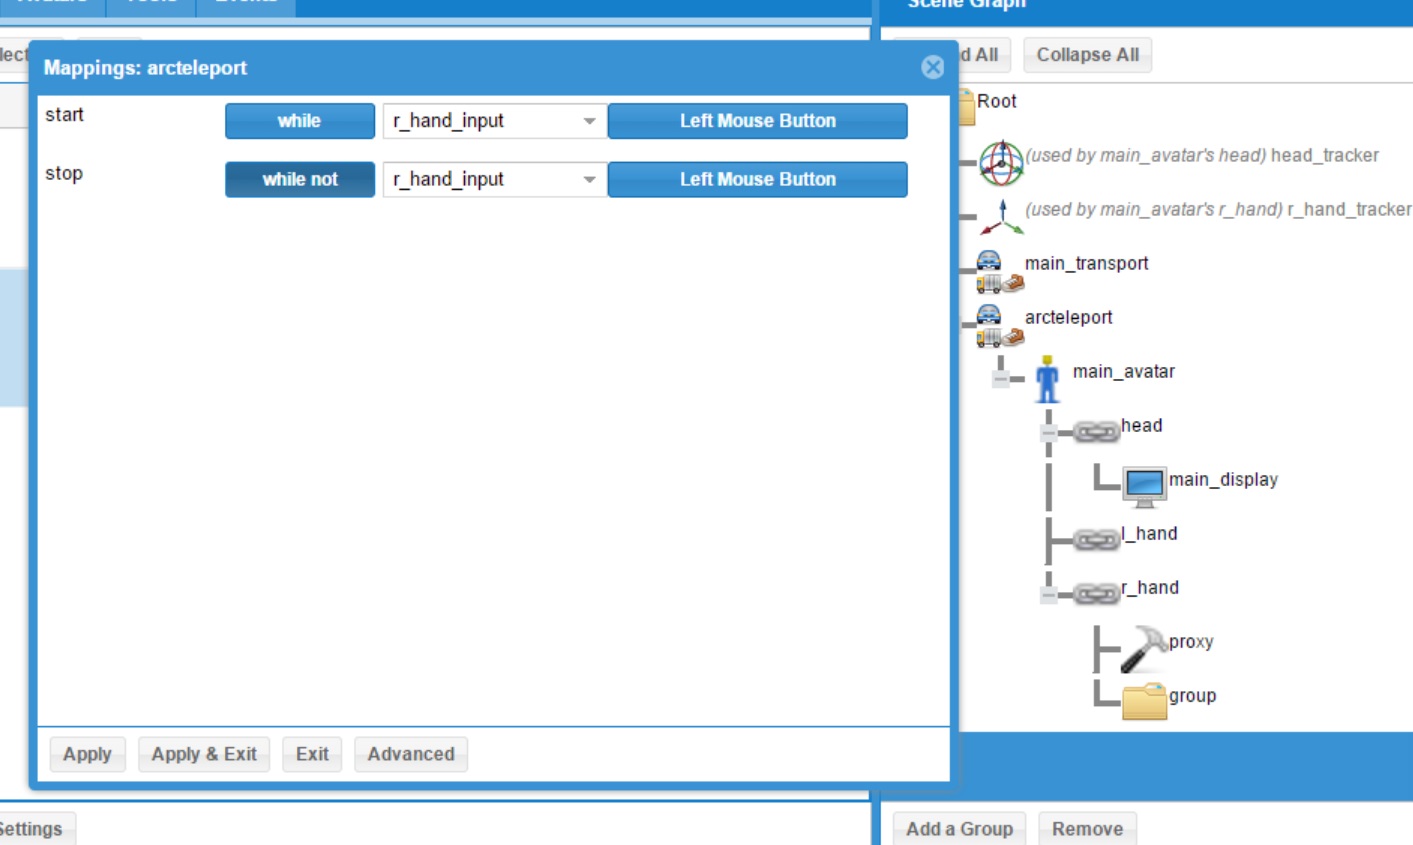
Lastly, click on “Mappings” and choose which button you want to initiate the arc teleport. To have the snap button be used to both place and teleport, use the “while” and “while not” options
You can now use the arc teleport in any scene you apply this vizconnect file to
Snap Rotation
For a vizconnect with added “snap” rotations, download a premade vizconnect file here (for the Vive/SteamVR preset).
You can modify which buttons are used to rotate under the “Events” tab under “Mappings”
To set up snap rotation manually, follow these steps:
Add a custom event under the “Events” tab and name one “Snap_Left” and a second one named “Snap_Right”
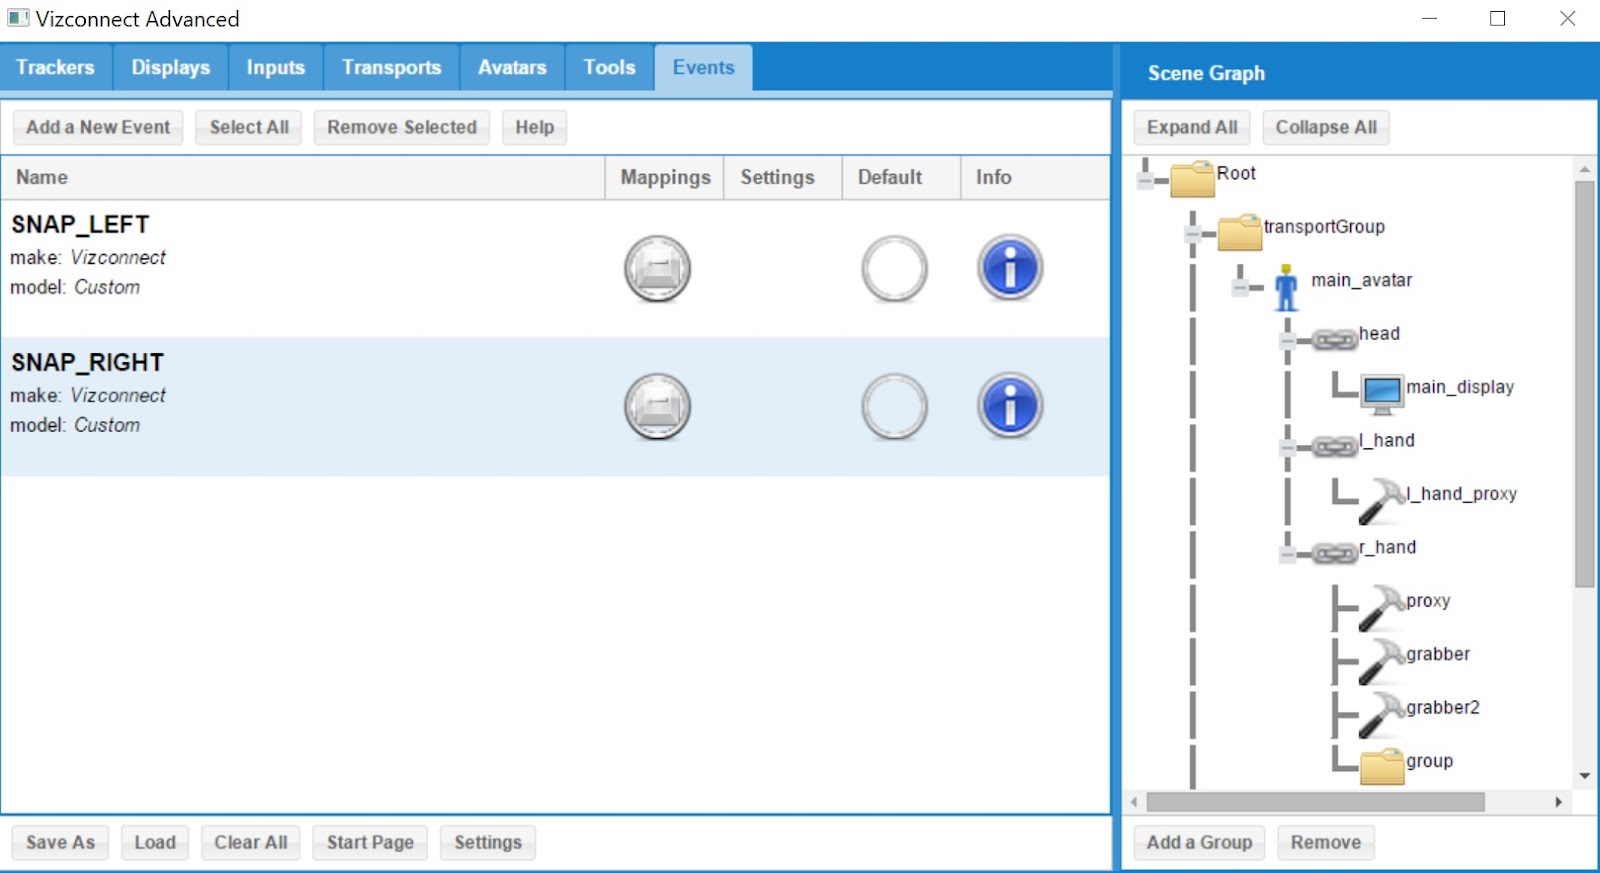
Under “Mappings” choose which buttons you want to use to rotate
Add this code in the postinit section of your vizconnect file by opening the vizconnect directly in Vizard and editing it:
def turnLeft(e):
vizconnect.getRawTransport('main_transport').snapLeft()
viz.callback(viz.getEventID('SNAP_LEFT'), turnLeft)
def turnRight(e):
vizconnect.getRawTransport('main_transport').snapRight()
viz.callback(viz.getEventID('SNAP_RIGHT'), turnRight)
Undoing a Teleport
Using a similar method to adding the events for snap rotation, create an event to use the undo teleport method, set your mappings and add this code to your postinit section:
def UndoTeleport(e):
vizconnect.getRawTransport('main_transport').undoTeleport()
viz.callback(viz.getEventID('UNDO_TELEPORT'), UndoTeleport)
For additional modifications and questions, see the Vizard documentation or contact support@worldviz.com
For more information on any of Worldviz products contact sales@worldviz.com