Baking Lighting in 3ds Max: A General Overview, Part 2

Baking in Max can be a daunting process. Last time, in Part 1 we talked about what you need to get started, options for renderers, a few of the different kinds of bakes you can do, plus how and why to do test renders.
Part 2
This time, in Part 2, we go into the approach for Unwrapping, the details of Render to Texture, and the actual baking.
Part 1 | Part 2
Initial Bake

Unwrap Model
Bakes work by recording the lighting intensity for each point on a model's surface into a texture. This means that, under normal circumstances, you don't want any overlaps or tiling used in the UV channel that you bake to otherwise you may have some very strange results in your baked lighting. While unwrapping by hand produces the best results, automatic unwraps are usually more than enough. Bake UVs are usually unwrapped to channel 3.
There are a few common options for creating lightmap UVs for large numbers of objects. One is to use the automatic unwrap feature of Render to Texture, though this always groups matching material IDs together resulting in a lot of wasted UV space. Another option is to use a scripted tool written in-house called SteamRoller, which does a similar function but isolated from any other dialog and without requiring the material ID option. Paid plugins also exists that can do unwrapping, some of which also have their own special baking options.

Baking Lighting in 3ds Max: A General Overview, Part 1
Baking in Max can be a daunting process. There are numerous choices, and it may be unclear what is going to give the ideal results. This guide gives a general overview of the process to take your work from an unbaked model to final baked scene.
Part 1
In this first section, we talk about what you need to get started, options for renderers, a few of the different kinds of bakes you can do, plus how and why to do test renders, and what mesh issues to look out for.
Part 1 | Part 2
Starting Out

Ready to Go
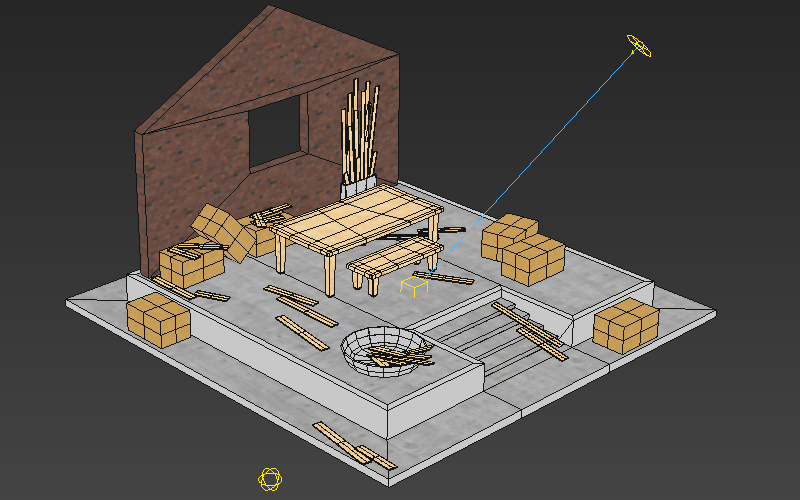
Before you're ready to bake, you'll ideally have a scene that's realtime ready. This usually means a low-ish polycount (under 2 million), Scanline:Standard materials, and bitmap based textures instead of procedural ones. While it's possible to bake high polycount objects, such as unoptimized architecture scenes, they may take an exceptionally long time to unwrap, and may also have trouble running once exported.
You'll also want to have some familiarity with the OSG Exporter, but if not you can also start off by loading up the sample preset file from the Storing and Loading OSG Settings tutorial.
Skydomes and the OSG Background Map Export Setting

Many scenes benefit from having a skydome in the background - an image of a sky that replaces the flat background color of a scene. The easiest way to do this with an OSG Export is to take advantage of the exporter's "Background Map" feature. This feature automatically generates an infinitely distant skydome that will never accidentally cut off our models or mess with your model's clip plane.
At the moment HDRI skydomes are not supported, but this feature may be coming sometime in the future.
Where to Get a Sky Texture
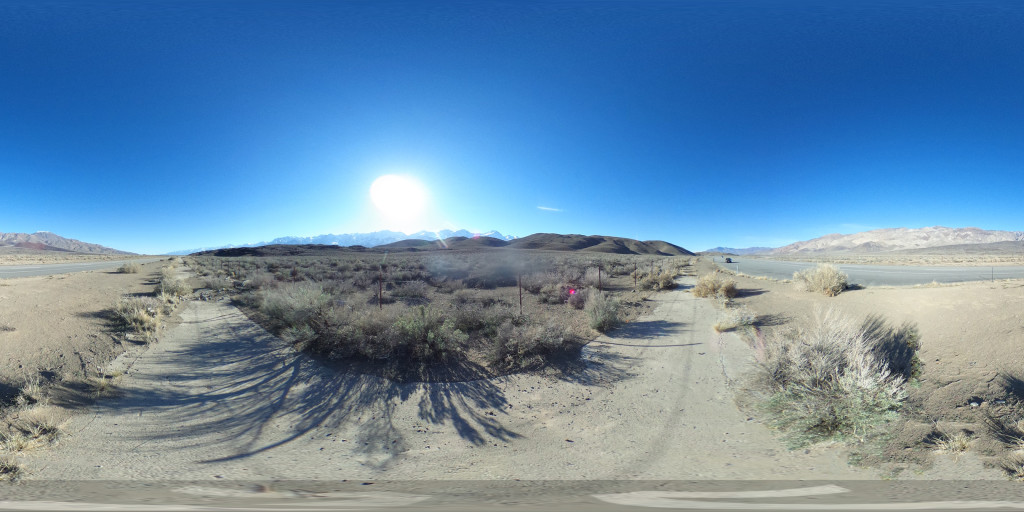
You can start off by grabbing high quality skydomes off of places like https://www.cgskies.com/, stock texture sites, or make your own with a 360 camera on a tripod (such as the Ricoh Theta) and capture through its associated remote shutter app. Various other solutions for capturing professional panoramas exist as well, such as incremental nodal camera mounts (e.g. Nodal Ninja) or automated heads (e.g. Gigapan), though these methods may have trouble stitching together moving objects such as clouds.
Here's a sample spherical panorama you can grab for testing, captured with an older Theta. The Theta has some stitching artifacts where the edges of its two lenses come together, but this is most noticeable when placed directly on a flat surface instead of a tripod. This version of the Theta also has a noticeable amount of color noise, even when shooting in well-lit situations with a low ISO.
In this example the tripod was originally visible, edited out in Photoshop using the polar coordinates filter and content aware fill, and the photographer (yours truly) was also removed using content aware fill. This sky texture has a small worldviz logo watermark at the very bottom which should not typically be visible unless a user manages to look underneath the ground.