Lip Syncing with Fuse/Mixamo Avatars
Programs Needed:
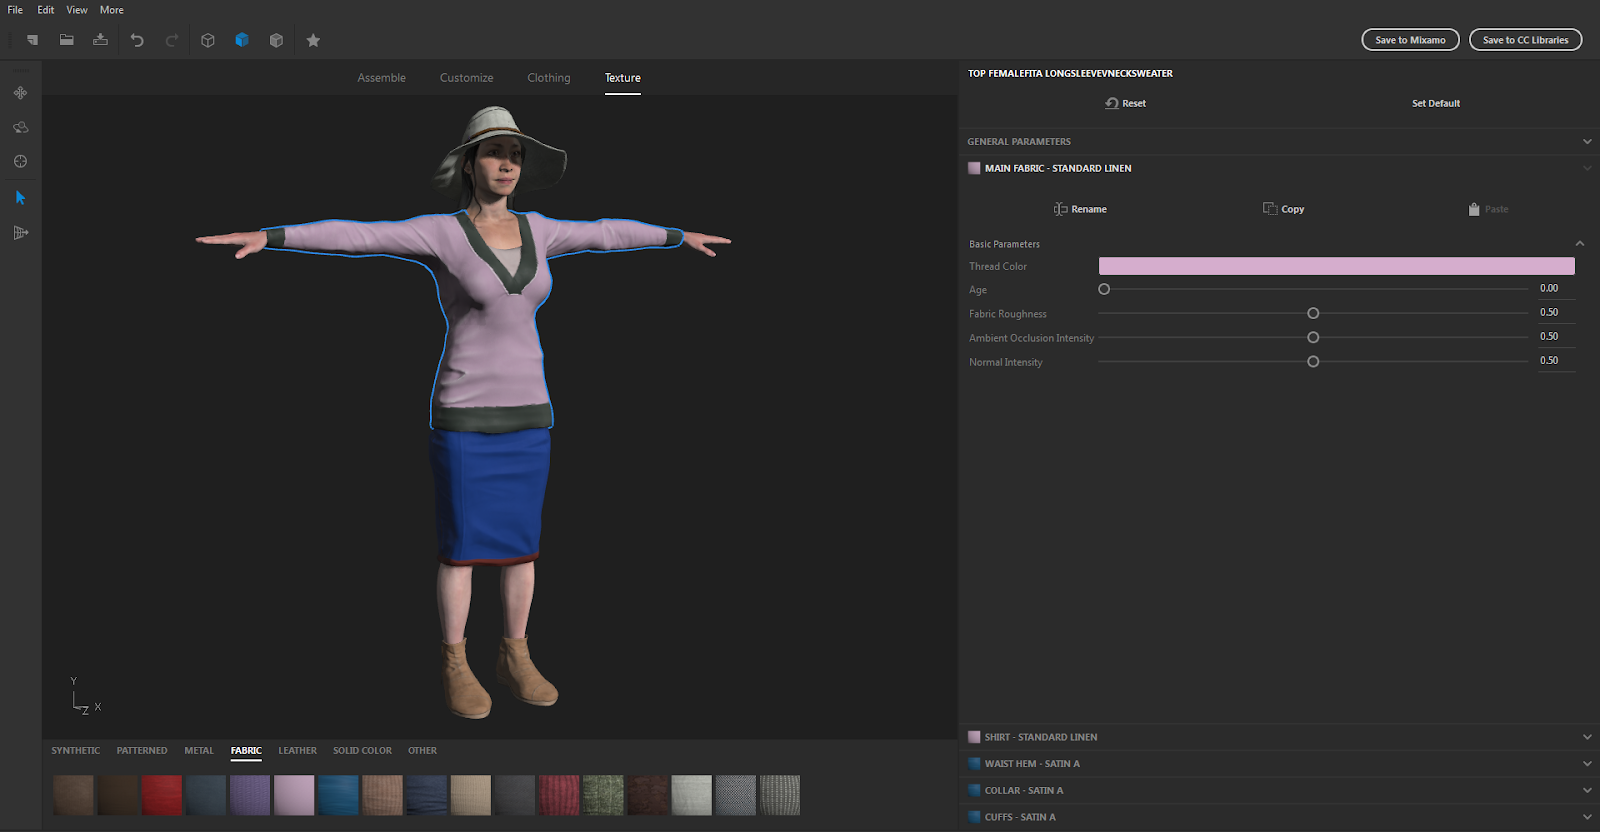
Fuse (available for free if you have a Creative Cloud membership, or on Steam)
3DSMax
Cal3D Exporter (available to download from the WorldViz website)
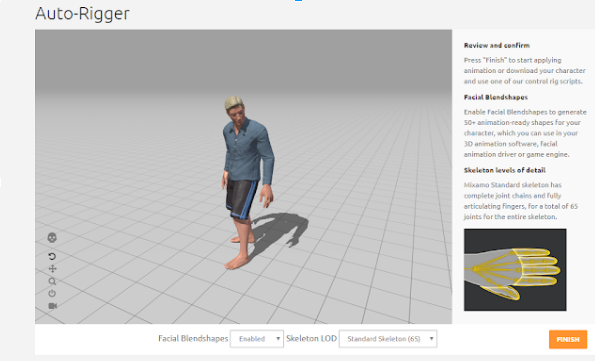
2. Go to “File- Animate with Mixamo” or click on “Send to Mixamo”

3. Make sure “Facial Blend Shapes” is enabled and click “Finish”, then “Use this Character”
4. Download as an FBX model
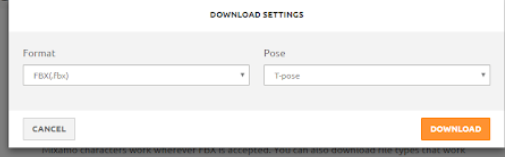
5. Also, at this time you may want to select and download any animations you will wish to use
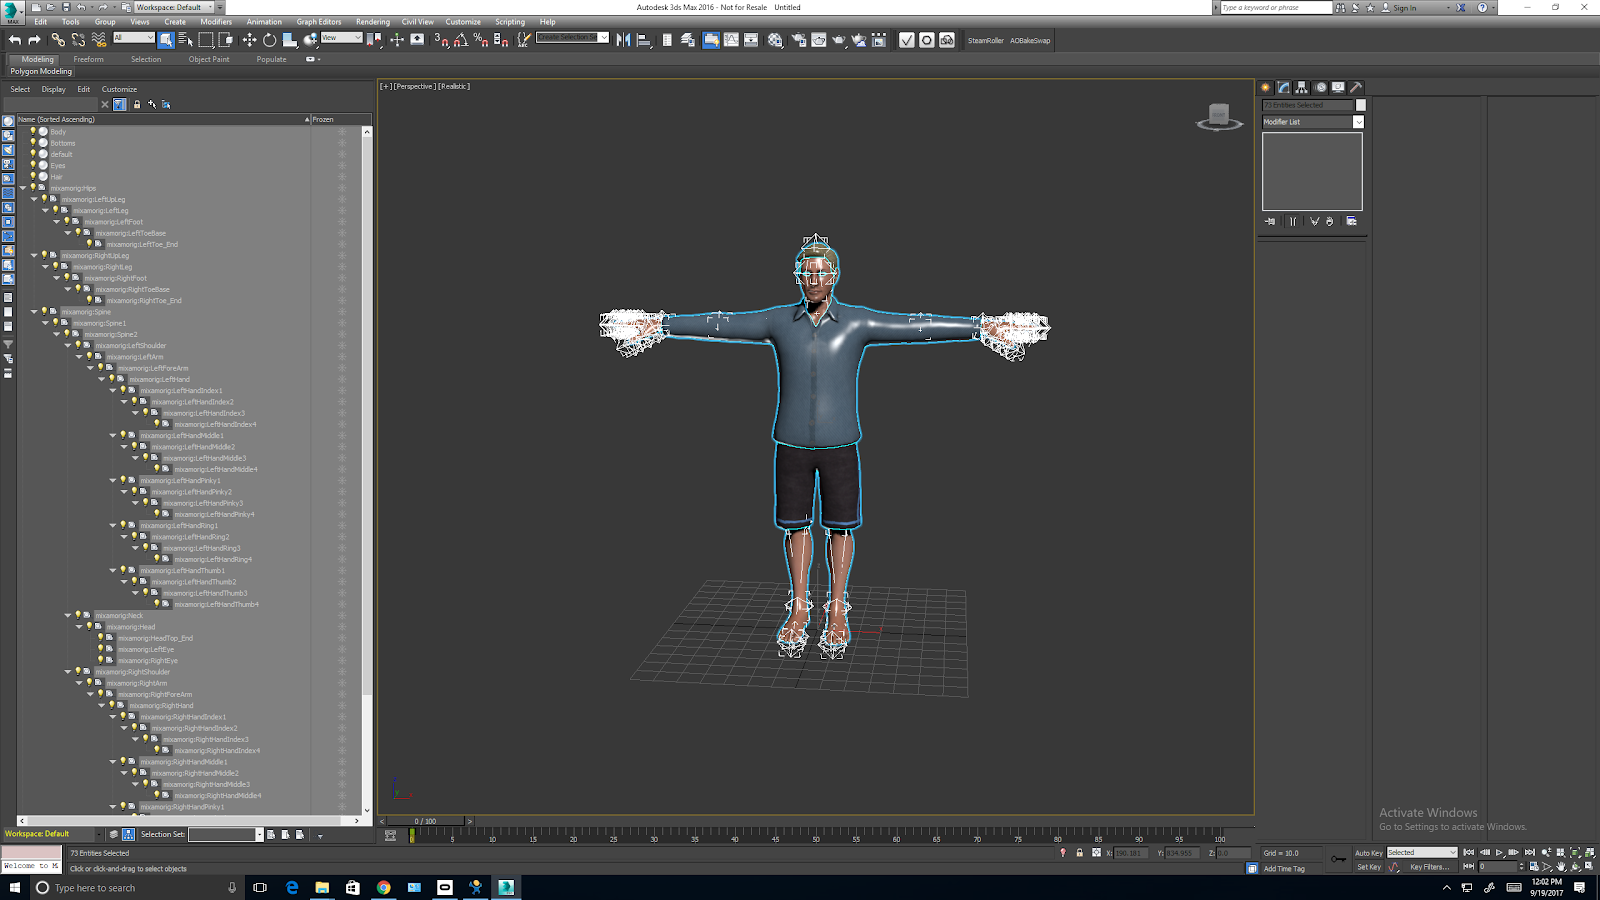
6. Open up 3DS Max and import your FBX model you just downloaded
7. Carefully follow the steps for exporting using the Cal3D exporter, outlined in the Vizard documentation http://docs.worldviz.com/vizard/index.htm#cal3d_introduction.htm%3FTocPath%3DContent%20Creation%7C3D%20Models%7CCal3D%20Workflow%7C_____1
8. Create a new folder and name it whatever you want to call your avatar
9. In 3DS Max go to File- Export- Cal3D skeleton file

10. Make sure your units are set to meters in the export window, name your file and save it in the folder you created.
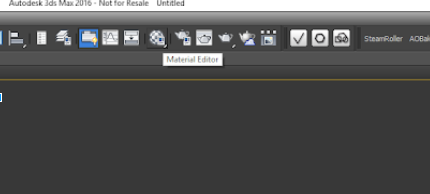
11. Next, select a mesh and click on the “material editor” and change the mode to “compact”
12. Rename each material so that it has sequential ID numbers in square brackets, e.g. body[0]
13. Now export your meshes, following the steps from the Cal3D exporter documentation
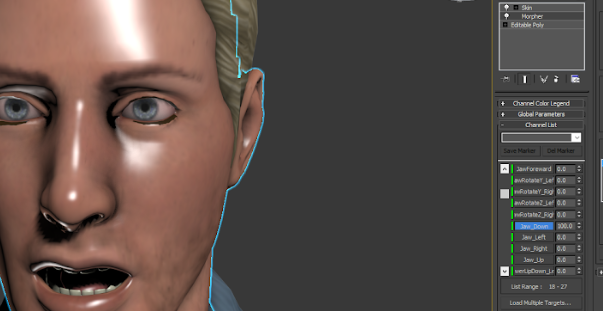
14. Next, select your head mesh, go to “Modify” and select “Morpher”

15. Click on where it says “Morpher” and you will see a list of all of your morphs show up. We will be using the one titled “Jaw_Down” for the lip syncing
16. Enter “100” in the value next to “Jaw_Down”
17. Now, export your head mesh once more and name this one something like “mSkel_m021_head_talk.CMF”
18. Next, export your materials using File- Export- Cal3D Material File
19. For the animations you will have to import each animation fbx model separately, then export using the Cal3D exporter and make sure to select the same skeleton you have been using. Save all your animations to the same folder as the other avatar files as well.
20. The next step is to create your .cfg file. Open up Vizard and select File- New Text file. Save your file as a .cfg file and give it a name. Make sure to save it in the same folder as all your other files.
21. Follow the steps in the documentation for setting up your .cfg file
22. You can test your Avatar’s morph and animations in Inspector by right clicking on your cfg file, select “Open with” and choose “Vizard 6 Inspector”
23. Once everything is setup, you can now add your Avatar to your scene, set its position, set its state, and then add the speech command by first importing the vizact module and using the code: speech = vizact.speak('jfk.wav') where “jfk.wav” is the name of any wave file you choose. You can now map this action to a keypress using vizact.onkeydown(' ', male.addAction, speech)
24. For a sample scene using a .cfg avatar and lip syncing click here . In the folder, open the FBX_lip_syncing.py in Vizard
If the lip syncing causes the head to distort in an unusual way, you may need to adjust the scale by adding vizact.speak(‘jfk.wav’, scale= [enter some value here])